Watch Now This tutorial has a related video course created by the Real Python team. Watch it together with the written tutorial to deepen your understanding: Using the bpython Enhanced REPL
The standard Python interpreter lets you run scripts from files or interactively execute code on the fly in a so-called read-evaluate-print loop (REPL). While this is a powerful tool for exploring the language and discovering its libraries through instant feedback on your code inputs, the default REPL shipped with Python has several limitations. Luckily, alternatives like bpython offer a much more programmer-friendly and convenient experience.
You can use bpython to experiment with your code or quickly test an idea without switching contexts between different programs, just like in an integrated development environment (IDE). In addition, bpython may be a valuable teaching tool in either a virtual or physical classroom.
In this tutorial, you’ll learn how to:
- Install and use bpython as your alternative Python REPL
- Boost your productivity thanks to bpython’s unique features
- Tweak bpython’s configuration and its color theme
- Use common keyboard shortcuts to code more quickly
- Contribute to bpython’s open-source project on GitHub
Before starting this tutorial, make sure you’re already familiar with Python basics and know how to start the standard Python REPL in the command line. In addition, you should be able to install packages with pip, ideally into a virtual environment.
To download the configuration files and sample scripts that you’ll use in this tutorial, click the link below:
Source Code: Click here to download the free source code that you’ll use to harness the power of bpython.
Get Started With bpython
Unlike stand-alone Python distributions, such as CPython, PyPy, or Anaconda, bpython is merely a pure-Python package serving as a lightweight wrapper around a chosen Python interpreter. Therefore, you can use bpython on top of any particular Python distribution, version, or even a virtual environment, which gives you plenty of flexibility.
Note: The letter b in bpython stands for Bob Farrell, who’s the original author and maintainer of the tool.
At the same time, bpython remains a familiar Python REPL with only a few essential features, such as syntax highlighting and auto-completion, borrowed from the full-fledged Python IDEs. This minimalistic approach contrasts with tools like IPython, which is yet another alternative to the standard Python REPL, popular in the data science community. IPython introduces a lot of custom commands and other extras that are unavailable in vanilla Python.
There are a few ways to get bpython on your computer. Package managers like Homebrew or APT offer pre-built versions of bpython for your operating system. However, they’re likely obsolete and hardwired to the system-wide Python interpreter. While you can build the latest bpython version from its source code by hand, it’s better to install it into a virtual environment with pip:
(venv) $ python -m pip install bpython
It’s common to have bpython installed in several copies across many virtual environments, and that’s fine. This allows you to wrap bpython around the specific Python interpreter that you used to create the virtual environment in the first place.
Note: Unfortunately, bpython isn’t natively supported on Windows because it depends on the curses library, which is only available on Unix-like systems, such as macOS and Linux. The official documentation mentions a work-around, which relies on an unofficial binary for Windows, but it seems not to work anymore. If you’re on Windows, then your best bet is to install the Windows Subsystem for Linux (WSL) and use bpython from there.
Once it’s installed, you can start bpython using either of these two commands:
bpythonpython -m bpython
It’s preferable to choose the more explicit second command, which invokes bpython as a runnable Python module. This way, you’ll ensure that you’re running the bpython program installed into the currently active virtual environment.
On the other hand, using the bare bpython command could silently fall back to the program installed globally, if there is one. It could also be aliased to a different executable in your shell, taking precedence over the local bpython module.
Here’s an example illustrating the use of bpython against a few different Python interpreters encapsulated within isolated virtual environments:
(py2.7) $ python -m bpython
bpython version 0.20.1 on top of Python 2.7.18
 ⮑ /home/realpython/py2.7/bin/python
WARNING: You are using `bpython` on Python 2. Support for Python 2
 ⮑ has been deprecated in version 0.19 and might disappear
 ⮑ in a future version.
>>> import platform
>>> platform.python_version()
'2.7.18'
>>> platform.python_implementation()
'CPython'

(py3.11) $ python -m bpython
bpython version 0.23 on top of Python 3.11.0
 ⮑ /home/realpython/py3.11/bin/python
>>> import platform
>>> platform.python_version()
'3.11.0'
>>> platform.python_implementation()
'CPython'

(pypy) $ python -m bpython
bpython version 0.23 on top of Python 3.9.12
 ⮑ /home/realpython/pypy/bin/python
>>> import platform
>>>> platform.python_version()
'3.9.12'
>>> platform.python_implementation()
'PyPy'
Notice that you use the same command to run bpython from different virtual environments. Each highlighted line indicates the interpreter version and a path to the Python executable that bpython wraps in the current REPL session. You can confirm the Python version and its implementation through the platform module from the standard library.
Note: The Django web framework can detect bpython if it’s installed in your virtual environment. The framework will automatically run bpython when you execute the shell command to bring up the Python interactive interpreter with your project files on the module search path.
Okay, now that you’ve learned how to install and run bpython as an alternative Python REPL, it’s time to explore its key features. Over the next few sections, you’ll discover several ways that bpython can increase your productivity as a Python programmer, regardless of your skill level.
Spot Typos at a Glance
Compared to bpython, Python’s standard REPL is like an old black-and-white TV set. It does the job of accurately conveying information, but sometimes you wish to see things in color for greater clarity. That’s particularly important during code editing, where every detail matters. Therefore, syntax highlighting and bracket matching are perhaps the most common features found in any decent IDE or code editor.
In bpython, you get both features out of the box, even though it’s only a text-based user interface (TUI) to the Python REPL. Colorful syntax highlighting helps you identify the structure of your code at a glance, while bracket matching makes it easier to keep the opening and closing brackets correctly balanced. Read on to see those features in action.
Syntax Highlighting
As you type code into bpython, your instructions get tokenized into Python keywords, operators, comments, variables, and literal values like strings, numbers, or Booleans. Each token type has an associated color to let you quickly see what kind of language construct you’re working with:
This tokenizing and coloring isn’t done by bpython directly, but by the Pygments library used under the surface. Later, you’ll learn how to customize the color theme in bpython.
Bracket Matching
In addition to providing syntax highlighting, bpython also lets you know if the opening and closing brackets in your code are correctly balanced. When you type a closing bracket, bpython will highlight the corresponding opening bracket and the other way around:
This works with different kinds of brackets in Python, including round brackets (()), square brackets ([]), and curly brackets ({}). You can even nest brackets inside one another, and bpython will highlight the correct pair of brackets when you place your cursor on one of them.
Type More Quickly and Accurately
When using the regular Python REPL, your coding speed is directly limited by how quickly you can type and how well you remember the names of functions, their arguments, and so on. In contrast, bpython provides useful suggestions that you can apply at the hit of a button with auto-completion. Plus, it helps you correctly indent your code and offers contextual history.
All these features can save you a lot of typing and help avoid annoying typos, making you faster and more productive at work.
Code Suggestions
As soon as you start typing something, bpython will look up Python keywords, built-ins, globals, and your current lexical scope according to the LEGB rule to find objects with matching names. It matches names that begin with a specific sequence of characters, so typing more characters will narrow down the results. It’ll then display a list of relevant suggestions in alphabetical order:
In this example, you’re getting suggestions for the pass statement, a few built-in functions like print(), and a user-defined variable called program_variable that was defined earlier in the current global scope.
You can cycle forward through those suggestions with Tab or cycle backward with Shift+Tab if you accidentally overshoot. This can be especially helpful when there’s too much content to fit on your screen.
Code suggestions also work in other places, a handy feature that you may use for type introspection to find out what attributes and methods are available in an object. But that’s not all!
Auto-Completion
Code suggestions go hand in hand with auto-completion, which is another nifty feature in many code editors, and bpython has it too. Essentially, it can write the remaining code for you when there’s no ambiguity about what you’re trying to type:
As you cycle through the available suggestions with Tab or Shift+Tab, bpython goes ahead and inserts the highlighted option into the Python REPL. On the other hand, if there’s only one suggestion left and you haven’t finished typing the whole name, then you can press Tab to have bpython automatically complete the remaining part.
A lesser-known fact about bpython’s auto-completion mechanism is that it understands your file system. In other words, when you start typing a string literal that resembles a file path and you hit Tab, then bpython will list all the files and folders that match the string you’ve typed so far:
It also expands special symbols. For example, the tilde character (~) is a shorthand notation for the current user’s home directory on macOS and Linux, which bpython will expand into an absolute path, saving you even more typing.
Auto-Indentation
When you write long blocks of code in the standard Python REPL, you must correctly indent each line yourself. This can be tedious, error-prone, and unnatural if you’re used to writing code in a full-fledged editor. Fortunately, bpython automatically adds the appropriate amount of indentation to the next line when you press the Enter key:
The default indentation in bpython is four spaces, which complies with the Python style described in a document called PEP 8. However, you can change the corresponding tab-length option in bpython’s configuration if you prefer a different indentation size. To exit the current block of code, you can hit Enter without typing anything on that line. This will reduce the indentation level by one.
Contextual History
The standard Python REPL keeps an unlimited history of the in-line instructions that you typed previously, even those from finished interpreter sessions. You can find your command history in a file named .python_history located in your user’s home directory. Like many other tools, the interactive Python interpreter handles the history through an interface to the GNU Readline library or by emulating it.
On the other hand, your bpython history is stored separately in a file called .pythonhist and is limited to one thousand lines by default, although you can increase that limit in the configuration. Despite these differences, both the standard Python REPL and bpython conceptually support the same basic commands to access the history. That said, bpython also maintains a contextual history, with results depending on where you are in your code.
You can browse the history by repeatedly using the arrow keys on your keyboard. Use the Up arrow to go back in time and the Down arrow to go forward in time, one line of code at a time. You can hit Enter to confirm your choice and reuse one of the old instructions:
Notice how the historical suggestions offered by bpython don’t always follow their chronological order. Instead, bpython filters out suggestions that wouldn’t fit the context on your current indentation level.
Unlike in the vanilla Python REPL, in bpython, history also comes into play when you start typing a line of code that’s already been executed before:
As soon as bpython finds a historical entry that begins with a matching character sequence, it’ll show a grayed-out completion. You can ignore it by typing something else over it, or you can accept the suggestion by pressing the Right arrow on your keyboard to have it auto-completed.
Avoid Context Switching
While computers are made for multitasking, humans aren’t very good at it. Context switching requires your brain to save the current state of each task, then jump to a different task, and continue from where you left off the previous task. This takes time and energy and can lead to mistakes, reducing your productivity. As a programmer, you already have enough complexity to worry about, so your tools should work to minimize context switching.
Integrated development environments, or IDEs, address this problem by consolidating various tools for writing software into a single application. The bpython REPL also provides means to help you maintain focus through the following features:
- Type Introspection: Look into objects at runtime to reveal their members.
- Function Signatures: See the expected parameters of functions and methods.
- Docstrings: Read the user-provided descriptions of types and functions.
- Source Code: View the underlying code of an object at hand.
By having this information right where you need it, you no longer have to open another program to explore unfamiliar code, potentially losing track of what you were doing. You’ll take a closer look at each of these features now.
Runtime Type Introspection
Code suggestions in bpython work in many places. One of them is Python’s dot operator (.) for accessing members of an object. Normally, you need to know the names of attributes and methods defined in a class up front or check the corresponding documentation or source code to avoid an attribute error. Fortunately, bpython allows you to introspect objects and filter their attributes at runtime without ever leaving your terminal.
For example, say that you’re creating a multithreaded application and don’t remember the exact name of a given method or attribute in the threading.Thread class. In this situation, you can use bpython like this:
Note that only public members are displayed by default because, under normal circumstances, you’re not supposed to touch the object’s internal implementation. However, occasionally, you may want to reach for or modify its internals. To reveal such private members in bpython, type one or two underscore characters (_) right after the dot operator.
Many of the suggested members whose names start with a double underscore are, in fact, special methods that allow for operator overloading in Python.
You can also use bpython’s suggestions to explore Python modules and packages before importing them. The REPL knows what modules are importable in the existing session, including the Python standard library, third-party libraries installed with pip, and custom modules located in your project folder. To trigger those suggestions, type import followed by a single space and at least one character, and then hit the Tab key:
Just like with inspecting object attributes, internal modules don’t show up as suggestions in bpython unless you explicitly request them by using the leading underscore or double underscore. Once you import a specific module, you can examine its contents using the familiar dot operator as before.
Function Signatures and Docstrings
When you type an opening parenthesis to call a function or method in bpython, it’ll display the corresponding function signature with its formal parameters and their default values. It’ll also show information on which ones are positional, positional-only, keyword, or keyword-only arguments:
As you provide values for your function call, bpython highlights the current parameter name in the function signature to indicate how many are left. This can be very helpful when the function expects multiple arguments.
Note: Displaying function signatures is an amazing feature of bpython. Unfortunately, this feature doesn’t support type hints, so the types of arguments or the function’s return value aren’t shown at all even if they exist in the source code.
Other than that, you’ll notice that some callable objects, such as complex(), don’t trigger their function signatures in bpython. Those are typically implemented as classes with special methods to make them appear and behave like functions, which bpython can struggle with.
Function signatures already provide plenty of useful information that can help you understand what a function or method does without having to look up its documentation. However, bpython goes the extra mile by displaying a docstring from the function’s body if it can find and extract one from the source code. In the example above, both your sub() function and Python’s built-in max() function have docstrings that bpython shows.
A docstring is usually a multiline string literal that immediately follows the function signature and contains a human-readable description of the function. Sometimes, it may include details about the function arguments or automated doctests to self-test and demonstrate how to use the function. Automatically displaying docstrings is more efficient than using Python’s built-in help() function or accessing the function’s .__doc__ attribute.
If neither the function signature nor the docstring is enough for you, then you can use bpython to reveal the underlying source code.
Source Code Preview
Contemporary code editors let you navigate to the definition of a symbol by clicking on it while holding a designated key on your keyboard. This works equally well for symbols that you’ve defined in your project and ones that are defined in the Python standard library or a third-party package installed with pip. In bpython, you can display a read-only preview of the corresponding source code by pressing F2 after typing a given symbol:
You can type the name of a module, function, or class. Depending on the type of symbol, you’ll only see the source code belonging to that particular scope. Interestingly enough, you can request the source code of the functions and classes that you defined earlier in the same REPL session.
Note: The source code preview opens in your operating system’s default terminal pager program, which is usually the Unix less command. You can use the arrow keys or Page Up and Page Down to scroll up and down, and press Q to quit. Searching is also possible with a forward-slash (/) and then N for the next occurrence or P for the previous one.
Whether you use a code editor or bpython, this feature will only work as long as there’s pure-Python source code available. On the other hand, if the symbol that you’re interested in is a built-in function or was implemented as an extension module in the C programming language, then you won’t be able to get any information about it. Instead, bpython will display a message that no source code was found.
Fix Mistakes More Quickly
Code editing capability is another area where the standard Python REPL is lacking. Oftentimes, you’ll find yourself retyping the same piece of code over and over again because of typos in nested blocks of code that are difficult to fix without starting from scratch.
Even with bpython’s intelligent code suggestions and auto-completion, you’ll occasionally make mistakes or just change your mind about a particular implementation when typing out code. The bpython REPL makes editing and reevaluating your code a breeze, offering many useful features that allow you to:
- Rewind one or more lines
- Edit code in an external editor
- Reload imported modules
In the following sections, you’ll learn how to use these neat features of bpython to quickly fix mistakes and typos or to change the implementation of your code snippets.
Rewind One or More Lines
When you make a typo in the middle of a code block using the vanilla Python REPL, then you have to retype the entire block of code from scratch. In bpython, you can press Ctrl+R to undo only one or just the last few lines and replace them with new ones:
Beware that each time you rewind even a single line of code, bpython runs the entire REPL session from the beginning again, including unedited lines that you’ve already executed. Therefore, you should be extra careful about the potential side effects of mutating an external state—for example, when writing to a file, database, or network connection.
The rewind feature is a great way to fix a mistake that you spotted right after making it, but it’s ill-suited for fixing earlier errors or for making major changes. For this, bpython has something else to offer.
Edit Code in an External Editor
By pressing Ctrl+X on your keyboard, you can add or modify code located at the current line in your bpython REPL using an external code editor:
The line selected for editing may be empty, or it may already contain some Python instruction that bpython will first save to a temporary file for the external editor to load. Note that you’re allowed to add more than one line of code while you’re using the editor—for example, to define a new function or an entire class. Once you’ve finished making modifications, save the file and exit your editor to return to bpython.
The bpython REPL will detect when you close the editor. Then, it’ll inject your new code from the temporary file back into the current session and reevaluate it, just as with the rewind feature before.
Note: The editor configured by default in bpython is the venerable vi, which comes with many Unix-like systems. While vi is a powerful editor, it earned a bad rap for its confusing modes and keyboard shortcuts. Therefore, you may want to choose a different editor that doesn’t require as much learning to master. You’ll find out how to change the code editor in bpython to something more modern, like Visual Studio Code, later on.
In addition to editing a single line or a block of code, you can edit your entire REPL session using an external code editor in bpython. Press F7 to open your current session in an editor:
This time, you’ll see all the contents of your REPL session, including outputs of the previous instructions in the form of comments. They’ll be ignored, as bpython will eventually reevaluate your session when you close the editor.
Note: When you paste a longer piece of code into bpython—for example, through an external editor—it knows where the entire code block ends, as you’d expect. This is an improvement over the regular Python REPL, which isn’t so clever about handling newlines.
For instance, newlines between class method definitions raise an IndentationError when evaluated by the vanilla Python REPL, but not in bpython:
The standard Python REPL requires you to think about the code as if it were entered by hand. Therefore, you must pay particular attention to blank lines within a code block when pasting code using the regular REPL.
There’s another way to use a code editor with bpython, which you’ll learn about next.
Reload Imported Modules
You can use any code editor in conjunction with bpython to modify helper functions and classes defined in your local modules or packages and have them reloaded in the current REPL session on demand. It’s a great way to test and debug code without restarting bpython when you change some imported code.
After saving your updated modules in a code editor, press F6 in bpython to reload them and reevaluate the complete session since starting the REPL:
Reloading modules keeps existing instructions in your current REPL session intact and reruns them, resulting in updated outputs. This feature is an invaluable tool for exploratory testing. It can boost your productivity by cutting down on time spent restarting bpython and retyping the same instructions all over again.
The bpython REPL also supports automatic module reloading so that you don’t have to manually hit a button every time you make some changes to the code in an external editor.
Note: At the time of writing, the auto-reload feature was only available on the latest development version of bpython (0.24-dev) running on top of Python 3.10.2 or earlier. To learn how to install bpython from source code, head over to the later section on contributing to bpython.
Moreover, to take advantage of the auto-reload feature, you’ll have to install the external watchdog library as an optional dependency in the same virtual environment where you installed bpython.
Remember that whether you reload modules manually or let bpython do that automatically for you, it always triggers the complete session reevaluation. To enable the auto-reload feature, hit F5 while you’re in bpython:
It’ll start monitoring your imported modules and packages and automatically reload them in the current REPL session whenever you save one of their files. This is a dramatic improvement over manual module reloading, and it can save you a ton of time. To disable the auto-reload feature, hit F5 again, which works like a toggle.
As you can see, bpython provides several code editing features that are missing from the vanilla Python REPL, helping you fix mistakes and refactor your code more quickly. But there’s more that you can do with bpython! If you’re a teacher, then you’re going to love the fact that it lets you export your REPL session and share it with others in a few convenient ways.
Share Your REPL Session
The bpython REPL is an excellent teaching tool that you can use to explain an idea and then share the resulting code snippet with your coworkers or students in a classroom. After you’ve written something in bpython, you can copy the entire REPL session with all outputs to the clipboard, save it in a file, or share it online.
Copy to Clipboard
You can copy the contents of your REPL session to the clipboard with a single keystroke, which can be handy for sharing code snippets with others or pasting them into a Stack Overflow or Real Python Slack Community question. Note, however, that the copy-to-clipboard feature doesn’t work by default in bpython. To enable it, you must first install the pyperclip library into the virtual environment so that bpython can import it.
Once it’s installed, press F10, which is the default shortcut, to grab your REPL session:
That’s a fantastic way to share working code examples with others, especially if you want to include the output of your code. However, it’ll be copied in plain text without any syntax coloring, so make sure to paste it into something that can understand Python to bring the colors back.
Alternatively, instead of pasting the code by hand into a messaging application or a text editor, you can save your current REPL session directly to a local file on your computer.
Save to File
The default keyboard shortcut to save your bpython REPL session to a file is the familiar Ctrl+S key combination, which most Windows PC programs use for this purpose:
It’ll ask you to type the name of the file to be created in your current working directory or an entire path indicating where you want it to be saved. If the file already exists, then you’ll have the option to overwrite it, append to it, or cancel the operation.
Note: On some Unix shells, the Ctrl+S key combination is a standard hot key reserved for stopping the output of a running program. It sends a special XOFF code to pause the transmission of data through the terminal, overriding bpython’s default behavior.
To disable this archaic software flow control, you can issue the following command in your terminal session:
$ stty -ixon
Now, you’ll be able to use the Ctrl+S shortcut in bpython. You can add this command to your shell profile, such as ~/.bashrc, to have this option automatically set when starting a new terminal session. Alternatively, you can change the default keyboard shortcut for saving files in bpython’s configuration to an unassigned key, such as F4.
The nice thing about saving code written in bpython to a file is that it won’t include the REPL prompts, such as the triple chevron (>>>) or the ellipsis (...), making the code easier to run. However, you still have to send the file as an attachment yourself if you want to share the code with others. That’s where sending your REPL session to a pastebin comes in handy.
Send to Pastebin
The third way of sharing code in bpython is to upload your REPL session to a pastebin, or an online text storage service. The bpython REPL supports bpa.st by default, which is an instance of pinnwand, but you can change the default pastebin to another service if you want to. When you hit F8 and confirm your choice with Y, then after a few moments, you’ll be presented with a publicly available URL to share:
As an owner, you’ll also get another URL, which you can use to delete the paste if you no longer want it on the server. If you don’t delete your paste yourself, then the corresponding URL will automatically expire after one week. You can change this default setting in bpython’s configuration, though.
When someone navigates to your paste on bpa.st, they’ll see a nicely formatted snapshot of your bpython REPL session with syntax highlighting and the ability to toggle the dark mode:
You can click one of the links below the uploaded REPL session to view the code in plain text without any colors, copy it to the clipboard, or download it as a file. There’s also an option to encode the REPL session using hexadecimal characters, which you can decode using Python’s binascii.unhexlify() function. This could be handy for debugging invalid characters. Note that your REPL session will include the prompts.
Configure bpython
The regular Python REPL doesn’t give you much flexibility when it comes to customizing it. On the other hand, bpython has a host of options that you can modify by editing a text file. However, bpython relies on defaults that are initially hard-coded in its source code. It’s only when you request to edit the configuration by pressing F3 in bpython that it’ll create the file from scratch and open it for you using a code editor:
This file resembles a Windows INI file with key-value pairs grouped by categories, which are processed by bpython using the configparser module. After saving the updated configuration, you’ll need to restart bpython for the changes to take effect.
Note that bpython follows the XDG Base Directory Specification, which defines a set of standard directories, including one for user-specific configuration files. If you’re running bpython on macOS or a Linux distribution, then it’ll save its configuration file under the ~/.config/bpython/config path. However, you can specify an alternative configuration file when starting bpython on the command line:
$ python -m bpython --config /path/to/alternative/configuration/file
This can be useful if you want to have different configurations for different projects, for example.
Note: It’s good to know the default location of the configuration file in case it has an error preventing bpython from starting. When it does, you can open the file in a text editor and fix the problem by hand.
In the next few sections, you’ll go through the most important bpython settings.
General Settings
One of the first things that you might want to change to improve your bpython experience is the external code editor, which defaults to the text-based vi. For example, to make bpython open Visual Studio Code instead, find the editor option under the [general] section tag and set it to the following value:
# ~/.config/bpython/config

# ...

[general]
editor = code --wait
The --wait flag is necessary to make VS Code wait for the files to close before returning. Otherwise, bpython wouldn’t see any changes in your session to apply.
You may also increase the number of lines to store in the history file by bumping up the hist_length option, which is normally limited to one hundred:
# ~/.config/bpython/config

# ...

[general]
hist_length = 999_999_999_999
Because bpython expects the configuration values to be valid Python literals, make sure that you type an integer literal for this option. You can use the underscore character (_) to visually separate groups of digits.
Another interesting option is pastebin_helper, which lets you specify the path to a program that bpython will call when you request that the REPL session be uploaded to a pastebin:
# ~/.config/bpython/config

# ...

[general]
pastebin_helper = /home/realpython/github_gist.py
By specifying this option, you can take control over what happens with the REPL session in bpython if you’re concerned about your privacy. For example, instead of uploading your code to bpa.st for everyone to see, you can create a secret gist on your GitHub profile while stripping out the REPL prompts.
Note: Remember that you’ll find the complete source code of the Python scripts and other files mentioned in this tutorial in the supporting materials, which you can download by clicking the link below:
Source Code: Click here to download the free source code that you’ll use to harness the power of bpython.
Here’s the content of a sample github_gist.py script, which creates a private gist on your GitHub profile using the GitHub REST API:
 1#!/usr/bin/env python
 2
 3import json
 4import os
 5import sys
 6from urllib.request import Request, urlopen
 7
 8def main() -> None:
 9    """Print the URL of a GitHub gist created from the standard input."""
10    print(create_gist(sys.stdin.read()))
11
12def create_gist(content: str) -> str:
13    """Return the URL of the created GitHub gist."""
14    response = post_json(
15        url="https://api.github.com/gists",
16        data={
17            "description": "bpython REPL",
18            "public": False,
19            "files": {"repl.py": {"content": content}},
20        },
21        headers={
22            "Accept": "application/vnd.github+json",
23            "Authorization": f"Bearer {os.getenv('GITHUB_TOKEN')}",
24            "Content-Type": "application/json",
25        },
26    )
27    return response["html_url"]
28
29def post_json(url: str, data: dict, headers: dict = None) -> dict:
30    """Return the JSON response from the server."""
31    payload = json.dumps(data).encode("utf-8")
32    with urlopen(Request(url, payload, headers or {})) as response:
33        return json.loads(response.read().decode("utf-8"))
34
35if __name__ == "__main__":
36    try:
37        main()
38    except Exception as ex:
39        print(ex)
The script reads the REPL session from the standard input (stdin) stream and writes the resulting URL onto the standard output (stdout) stream, which bpython can intercept and display. Thanks to the urllib.request module from the standard library, you can make HTTP requests in Python without installing any external libraries.
Note: To use the GitHub API, you must create a GitHub personal access token with the gist scope selected if you want to create gists programmatically. Notice that on line 23, the script gets your personal token from an environment variable named GITHUB_TOKEN, so you’ll need to set that environment variable before running the script.
You can do so by exporting the environment variable in each new terminal session or by permanently adding it to your shell profile:
$ export GITHUB_TOKEN="your token goes here"
Using environment variables is a good way to keep your API tokens secret, letting you manage them independently from your code.
Because it’s a Python script, to make it executable, you must include the shebang (#!) interpreter directive at the beginning of the file, which points to the Python interpreter. You must also remember to set the file mode to executable (x)—for example, with the chmod +x custom_pastebin.py command.
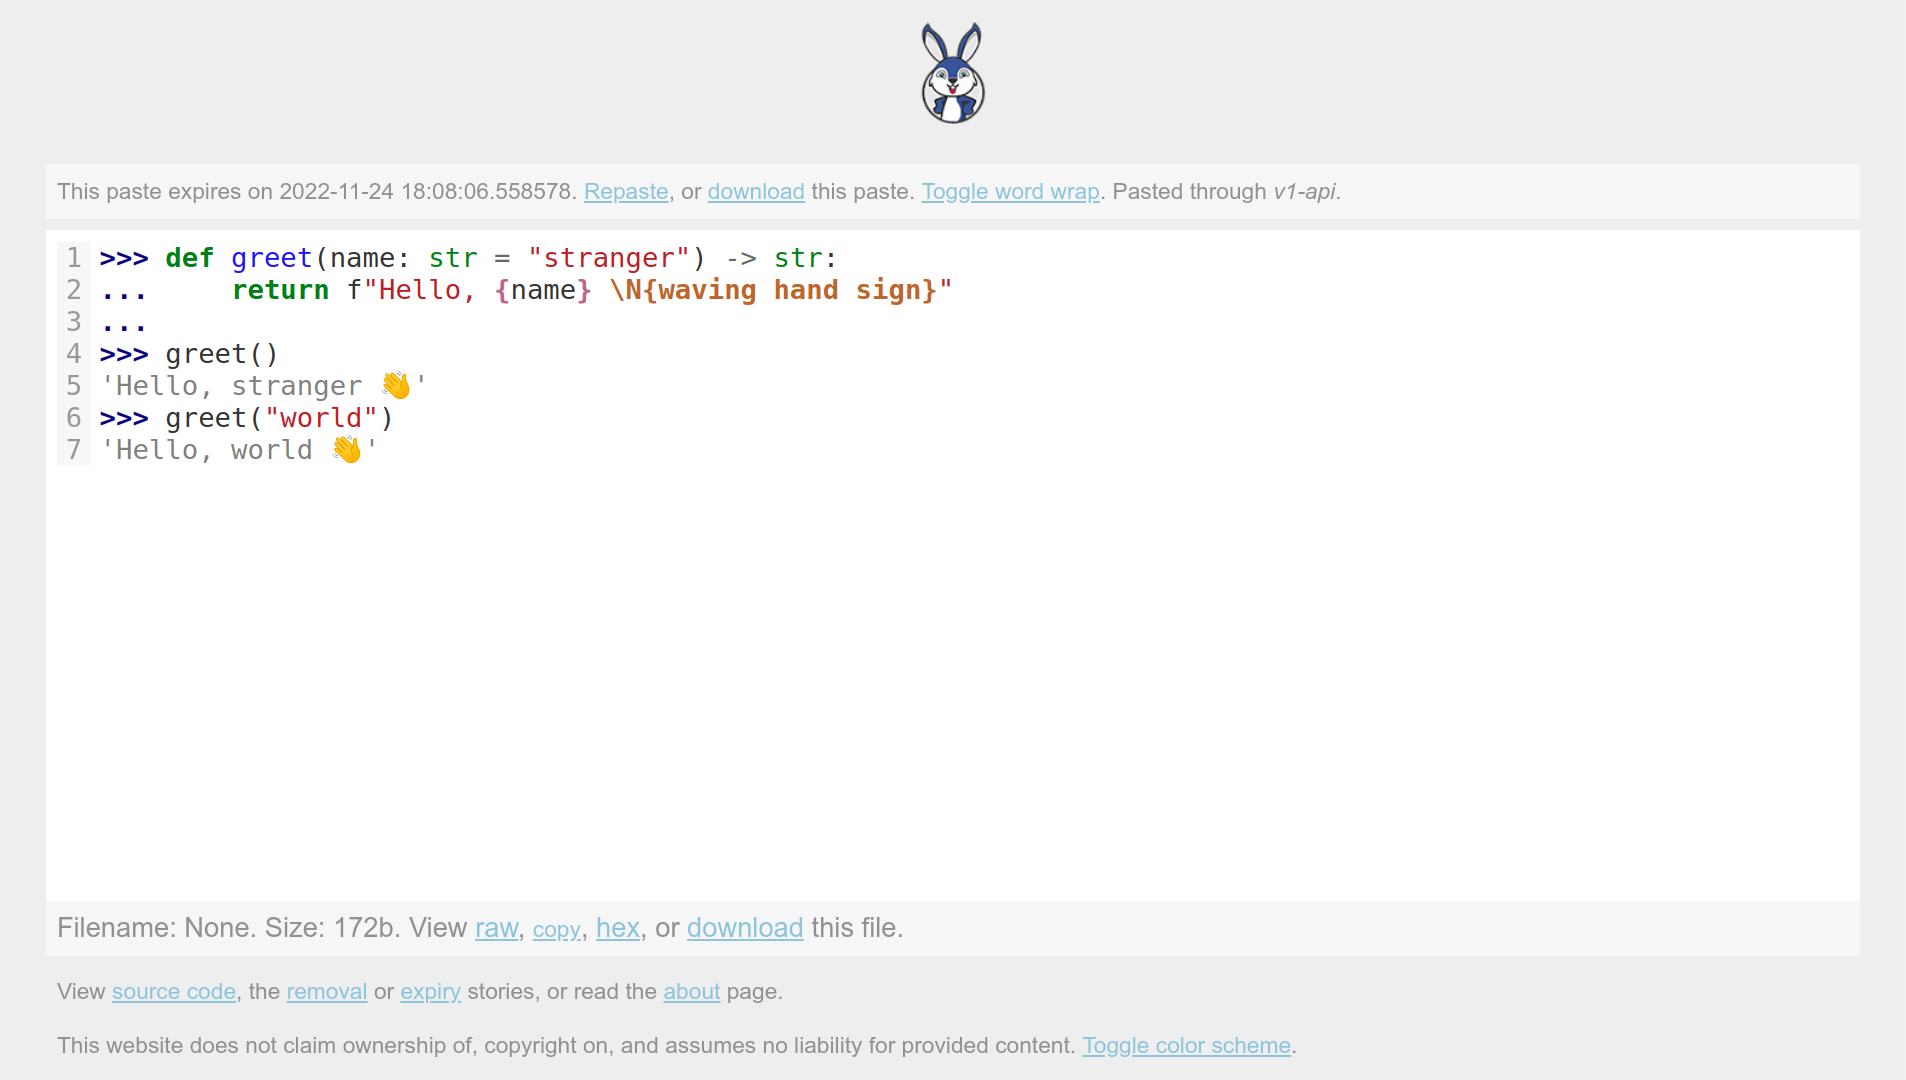
When everything works fine, you should be able to run the script from bpython by pressing F8. Then, you’ll see the URL of the GitHub gist that it creates:
>>> def greet(name: str = "stranger") -> str:
...     return f"Hello, {name} \N{waving hand sign}"
...
>>> greet()
'Hello, stranger 👋'
>>> greet("world")
'Hello, world 👋'
>>>
Pastebin URL: https://gist.github.com/01313aafa8ae3d2f5635a179e963ab42
If this doesn’t work for you, then try restarting bpython to ensure that it has loaded the configuration with the right path to your script. Make the script executable by setting the correct file mode, as you saw before. Finally, remember to define the environment variable with your personal access token with the required scope.
Now your secret gist will resemble the snapshot of a REPL session that you shared on bpa.st before:

For other configurable options available in bpython, including those that bpython may not generate when you first edit the configuration file, check out the configuration page in the official documentation.
Keyboard Shortcuts
The next section that you’ll find in bpython’s configuration file is tagged as [keyboard]. It represents keyboard shortcuts bound to specific actions, such as clearing the screen or showing the source code preview. You can define custom key bindings using the following syntax:
| Symbol | Meaning |
|---|---|
F1, F2, …, F12 |
Function keys ranging from F1 to F12 |
C-a, …, C-z, C-], … |
Key combinations consisting of the Ctrl key and a letter or a special symbol |
M-a, …, M-z, M-], … |
Key combinations consisting of the Meta key and a letter or a special symbol |
How do you know the names of options that correspond to the available actions in bpython? Fortunately, the generated configuration file contains commented-out mappings of actions and their default keyboard shortcuts. You can uncomment and update a few of them. For example, to avoid a conflict with a common global hot key for pausing your terminal, you can remap the shortcut for the save action to F4:
# ~/.config/bpython/config

# ...

[keyboard]

# All key bindings are shown commented out with their default binding

# pastebin = F8
# last_output = F9
# reimport = F6
# help = F1
# toggle_file_watch = F5
save = F4
# undo = C-r
# redo = C-g
# up_one_line = C-p
# down_one_line = C-n
# cut_to_buffer = C-k
# search = C-o
# yank_from_buffer = C-y
# backspace = C-h
# clear_word = C-w
# clear_line = C-u
# clear_screen = C-l
# show_source = F2
# exit = C-d
# external_editor = F7
# edit_config = F3
# reverse_incremental_search = M-r
# incremental_search = M-s
Don’t forget to restart bpython after saving the configuration file to make your changes effective. The configuration file is read only once, when bpython starts.
Color Themes
Many code editors allow you to change the color theme. This can help reduce eyestrain by letting you switch between light and dark themes to adapt to the lighting conditions in your environment. Also, if you get bored with the default color theme or require greater contrast, then you can always choose a theme that better suits your needs.
To customize the colors for syntax highlighting in bpython, you must create a .theme file placed next to the configuration file in your user-specific configuration directory. For example, if you’d like to create a light theme, then you could create a custom.theme file like so:
~/.config/
│
└── bpython/
    ├── config
    └── custom.theme
To tell bpython which theme file to use when it starts, you should set the color_scheme option in the configuration file:
# ~/.config/bpython/config

# ...

[general]
color_scheme = custom
Note that you shouldn’t include the .theme suffix here because bpython always appends it to the specified file stem.
Now, you can go back to your custom theme file, which may have the following contents inspired by the sample light theme available on bpython’s GitHub repository:
# ~/.config/bpython/custom.theme

[syntax]
keyword = M
name = r
comment = b
string = g
error = r
number = B
operator = c
paren = b
punctuation = b
token = g

[interface]
background = d
output = b
main = b
prompt = r
prompt_more = g
right_arrow_suggestion = K
The only difference from the linked theme file is in the highlighted line, which uses the letter d for a transparent background instead of w for white, which some terminals render incorrectly.
Here’s how the bpython REPL will look when you apply the custom theme that you’ve defined above:
Unfortunately, there’s only a small set of fixed color markers that you can choose from:
| Letter | Meaning |
|---|---|
d |
Default |
k |
Black |
b |
Blue |
c |
Cyan |
g |
Green |
m |
Magenta |
r |
Red |
w |
White |
y |
Yellow |
On the upside, you can make the font bold by using uppercase letters, so there’s a tiny bit of room for variety and creativity. For example, the uppercase letter Y will make your text yellow and bold.
Now that bpython is customized to your liking, you can start using it as your debugging tool.
Debug With bpython
Once you install bpython in a virtual environment, you can run the bpython command to start a new REPL session as usual. However, you can also import any of bpython’s internal modules in your regular scripts. Some of them may become particularly handy for debugging.
Embed the REPL in a Script
Say you wanted to perform postmortem debugging after intercepting an exception. In such a case, you can embed and start the bpython REPL right in your script after it crashes to introspect local variables using the dynamic nature of Python.
The following script expects the user to enter two numbers, which are then divided one by the other:
# adder.py

try:
    x = int(input("x = "))
    y = int(input("y = "))
    z = x / y
except (ValueError, ZeroDivisionError) as ex:
    import bpython
    bpython.embed(locals(), banner="Post-Mortem Debugging:")
else:
    print(z)
If the user provides a non-integer value for either of the two variables, then Python will raise a ValueError. When both values entered by the user are valid integers but the second one is equal to zero, then you’ll end up with a ZeroDivisionError instead. The script catches both exception types and embeds a bpython REPL with the local variables in response.
Here’s what a sample execution of that script can look like:
(bpython-venv) $ python adder.py
x = 42
y = 0
Post-Mortem Debugging:
>>> ex
ZeroDivisionError('division by zero')
>>> ex.args[0]
'division by zero'
>>> x
42
>>> y
0
>>> z
Traceback (most recent call last):
  File "<input>", line 1, in <module>
    z
NameError: name 'z' is not defined
Remember that you must run the script from within a virtual environment with bpython installed. Otherwise, you won’t be able to import its modules. As soon as there’s an exception, you’re dropped into an interactive bpython session with access to all your local variables, including ex, x, and y, which you can inspect and manipulate to gain additional insight into the issue.
Embedding a bpython REPL may not be enough, though. In the next section, you’ll learn about combining the power of a REPL with a text-based debugger.
Add a Breakpoint Using bpdb
If you want to use a proper debugger to step through your code and manipulate the local variables at any point in the execution of your script, then you can use the bpdb debugger that comes with bpython. It’s nearly identical to Python’s pdb debugger but has an additional BPython or B command that starts bpython at the current stack frame.
To take advantage of bpdb, you can modify your existing adder.py script in the following way:
# adder.py

try:
    x = int(input("x = "))
    y = int(input("y = "))
    import bpdb; bpdb.set_trace()
    z = x / y
except (ValueError, ZeroDivisionError) as ex:
    import bpython
    bpython.embed(locals(), banner="Post-Mortem Debugging:")
else:
    print(z)
The call to bpdb.set_trace() creates a breakpoint that’ll interrupt the execution of your Python program and start the interactive debugger. Note that since Python 3.7, you can call the built-in breakpoint() convenience function to have the same effect. Unfortunately, the function is hardwired to the classic pdb debugger by default. So, if you want to take advantage of bpdb instead, then you should import it explicitly, as in the example above.
Note: You can control which command breakpoint() delegates to by setting the PYTHONBREAKPOINT environment variable. For example, if you set its value to bpdb.set_trace then breakpoint() will always start the bpdb debugger.
Now, when your program reaches that breakpoint, it’ll pause its normal execution and drop you into the debugger. You can step through the code line by line. Type the lowercase letter n and confirm with Enter to advance to the next line. At any given point, you can type the uppercase letter B to embed the bpython REPL:
(bpython-venv) $ python adder.py
x = 42
y = 0
> /home/realpython/adder.py(7)<module>()
-> z = x / y
Use "B" to enter bpython, Ctrl-d to exit it.
(BPdb) n
ZeroDivisionError: division by zero
> /home/realpython/adder.py(7)<module>()
-> z = x / y
(BPdb) n
> /home/realpython/adder.py(8)<module>()
-> except (ValueError, ZeroDivisionError) as ex:
(BPdb) B
bpython version 0.23 on top of Python 3.11.0
 ⮑ /home/realpython/.pyenv/versions/3.11.0/bin/python
>>> x
42
>>> y
0
The highlighted lines indicate bpdb’s prompt where you can type its commands. You can exit the debugger in the same way you typically exit the REPL—that is, by hitting Ctrl+D to send the end-of-file (EOF) character.
Naturally, bpython comes with many more useful modules that you can take advantage of for purposes other than debugging. For instance, you could leverage its excellent code introspection mechanism if you were writing a static code analysis tool or something similar.
Discover bpython’s Quirks
Like every piece of software, bpython isn’t without its flaws. Probably the biggest one is that it doesn’t work on Windows without a bit of tweaking. Because you can’t run it as a native Windows application due to its dependency on the curses library, your best option is to install bpython through the Windows Subsystem for Linux (WSL).
There are small differences in presentation and behavior between the regular Python REPL and bpython that may surprise you when you first stumble across them. For example, tracebacks look slightly different. Pasting a piece of code into bpython may freeze the REPL until the entire code has finished executing, and printing certain ANSI escape codes can completely crash bpython. Nevertheless, those differences don’t cause much trouble in practice.
Note: The bpython command takes only a handful of arguments, so you might think that it doesn’t have the same functionality as vanilla Python. However, when bpython finds an unknown argument, such as -c, then it passes the argument down to the underlying Python interpreter.
Finally, despite its relatively long history, bpython hasn’t technically reached version 1.0 yet. Normally, this would mean the project is still in flux and subject to breaking changes. But this doesn’t seem to be the case for bpython, as it’s quite well established and reliable at this point.
Contribute to bpython
The bpython REPL is an open-source project licensed under the MIT license, whose source code is hosted on GitHub. Anyone can contribute to bpython in various ways, including fixing bugs, improving the documentation, adding translations, or suggesting new features. In fact, its home page has this encouraging message displayed at the bottom:
A special thanks to the Recurse Center who decided to devote a team of young developers to work on bpython as part of their training programme. They’re based in New York City and have a great attitude towards the development of programmers of all genders and backgrounds - take a look. (Source)
This message underscores bpython’s openness to contributions from newer and more established programmers alike. To make your mark, you can start by checking out GitHub issues labeled bitesize that are still open in the bpython project. They should be particularly suitable to get started with, and they can help you get familiar with the codebase.
First, fork the bpython project on GitHub under your name and have it cloned to your computer. Next, create and activate a virtual environment for the cloned project using Python 3.7 or later, and install your copy of bpython with the required dependencies in the editable mode:
$ git clone git@github.com:your-github-username/bpython.git
$ cd bpython/
$ python3 -m venv venv/ --prompt bpython-venv
$ source venv/bin/activate
(bpython-venv) $ python -m pip install -e .
If you’re running into problems during bpython’s installation, then try this legacy way of installing Python packages with setup.py instead of pyproject.toml:
(bpython-venv) $ python setup.py develop
This should pull the mandatory dependencies into your active virtual environment. If you want, you can also manually install optional dependencies that may be useful during development or for enabling extra features:
(bpython-venv) $ python -m pip install sphinx pytest pyperclip watchdog
You can now make some changes to bpython’s source code. For example, you can change the banner with the Python version that appears at the top of the screen when you start bpython. Go ahead and open the args.py module in your favorite code editor:
 # bpython/bpython/args.py

 # ...

 def version_banner(base: str = "bpython") -> str:
-    return _("{} version {} on top of Python {} {}").format(
+    return _("Welcome to {} \N{snake}").format(
         base,
         __version__,
         sys.version.split()[0],
         sys.executable,
     )
Because you installed bpython using the editable mode, changes like this will immediately show up in your virtual environment when you run the module. Try it! You’ll see something like this:
(bpython-venv) $ python -m bpython
Welcome to bpython 🐍
>>>
Isn’t that cool? You can customize the bpython REPL however you like. When you’re happy about your modification, and you’re ready to contribute back, then open a pull request to the original repository.
Conclusion
Great job! You can look back with satisfaction at all the new things that you’ve learned about bpython and how it surpasses the regular Python REPL on many levels. By now, you can install the bpython REPL on top of any Python interpreter, tweak its configuration to your liking, and appreciate its many IDE-like features. Maybe you’ll make bpython your default Python REPL from now on!
In this tutorial, you’ve learned how to:
- Install and use bpython as your alternative Python REPL
- Boost your productivity thanks to bpython’s unique features
- Tweak bpython’s configuration and its color theme
- Use common keyboard shortcuts to code more quickly
- Contribute to bpython’s open-source project on GitHub
Mastering a new tool can sometimes be daunting. But when you take the time to make yourself comfortable with bpython, you’ll be rewarded with powerful capabilities and become much more productive as a Python programmer.
Have you learned something new? Do you recommend any other tools similar to bpython? Feel free to comment below if you have any questions or feedback! And don’t forget to download additional materials for this tutorial by clicking the following link:
Source Code: Click here to download the free source code that you’ll use to harness the power of bpython.
Watch Now This tutorial has a related video course created by the Real Python team. Watch it together with the written tutorial to deepen your understanding: Using the bpython Enhanced REPL